Sunday, February 24, 2013

Daleks, Daffodils, and Grannys

Happy Sunday!
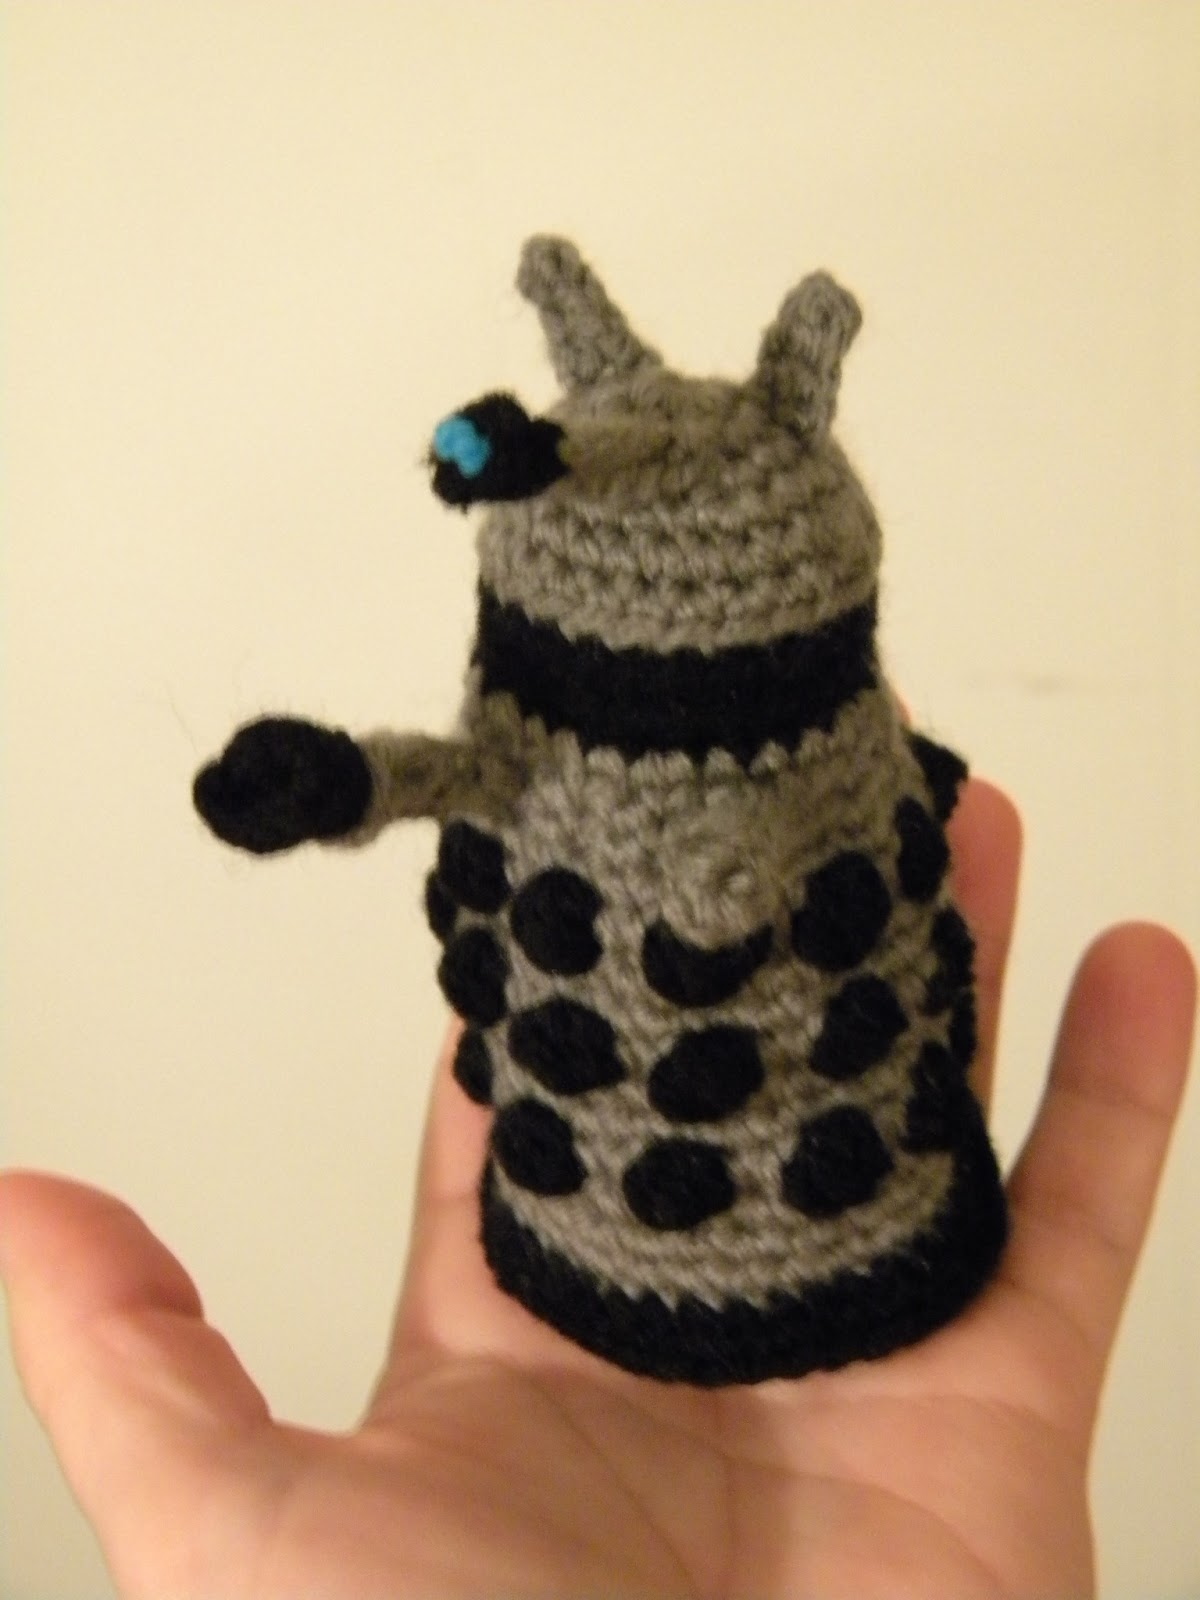
I recently made this little Dalek ... I got the basic pattern from Elle Skene on Ravelry. The original pattern was made as an Egg Cozy. A very cute idea, especially with Easter coming up. However, I really couldn't think of any reason I would need an Egg cozy so I went ahead and just made a stuffed version. 
Project Notes:
Hook: 4.00 mm/G
Yarn: Worsted Wieght Acrylic

My Alternations:
-First I changed this pattern up a little by increasing the black row at the bottom once more ... so it went: *2SC, SC, SC, SC, SC* all the way around. In the next round I crocheted only in the front loops. I then made a base by creating a flat circle. Starting with 6 SC in a magic ring and increased by one 5 times. I then stuffed the Dalek ... not too tightly though because I wanted it to sit flat and stand up. After simply attach the flat circle to the bottom by using a whip stitch and you're done!
- I added the little "ears" by simply chaining 4, then slip stitching in the second chain from hook down. Sew to top of head. 
-I also added the little "eye" piece at the end of the scope. I did this by SC4 in a Magic ring. I then tied a blue knot and sewed it to the center when I attached the black piece to the grey. 

I looooove this little Dalek! I can't wait to make more. I want to make one for all my Whovian friends ... if only time would allow!


I have also returned to working on my Summer Garden Granny Square Throw blanket.... 
It has been put away for quite some time while I focused on some other projects but I have decided I want to finish this piece sooner than later. 


So many wild colors!


Stacks of Squares!!!


I have decided to mix the blanket up a bit by added a few large squares randomly throughout ... here are the four I have made so far. I just love staring at them!

I still have quite a few more squares to go. So far I have 34/75 Small Squares and 4/5 Large Squares ... then I have to weave in ends, block them, sew them together AND create a border.

Lots and lots to do! Wish me luck!

Saturday, January 12, 2013

Crocheted Ewok!

     One of my biggest New Years resolutions this year was to really start trying to selling my creations. I have always been hesitant to really put myself out there, as many of you other crafters can identify with, I wasn't sure if what I was creating was "good" enough. Well, after a lot of pushing from friends and family, and some success at small festivals, I have decided to go for it! I mean if I LOVE my stuff other folks most likely will right?

     This was the first "Large" crocheted toy I have ever made and I am officially HOOKED! I have been making small/medium toys for over a year now, so I felt pretty comfortable creating one on a larger scale. I had the BEST time making this little Ewok. I already have several orders for more! I am also currently working on the pattern that I plan on selling at my soon to exist Etsy shop (along with the finished product). I'm hoping to have a number of things ready when I begin my shop so I will keep you all posted when I do! I'm aiming for sometime in February!

Anyway .... here he is in all his splendor!
 This little Ewok is pretty soft and very very snuggly! His "furry" face, ears and tummy are nice and fluffy! You can see his ruffly belly! 
 Relaxing here in his native habitat ... the forest!
                         His hat is removable, so I wanted to share a few shots of the Ewok in the buff!

I can't really express how much fun it was making this guy ... He was very, Very, VERY difficult to part with! I can attest to his cuddle factor as I caught myself snuggling him like a teddy bear more than once!


Friday, January 4, 2013

Simple Mangosteen Crochet Pattern


A Mangosteen is a type of fruit I first tasted in Southeast Asia. It seems to have received a lot of attention the past decade as an ingredient in “health” drinks and supplements. I can’t say how true the claims that mangosteen is “good” for your health, but it is a fruit and it is delicious so it’s got that going for it.  There is a pretty comprehensive website about mangosteens if you want to learn more. www.mangosteen.com

The pattern below is very simple, but the stem may be a bit tricky for beginners.


Materials:
  • Worsted weight yarn – purples (body) & greens (stem) – I went with very bright purple and green … obviously not the most realistic of colors – but hey – it’s a crocheted fruit – give me a break! Anyway, any colors you pick in those families will do just nicely. 
  • Hook - G/4.00mm
  • Stitch Maker (I like to use safety pins)
  • Fiber filling (I use polyfil)
  • Needle for stitching and darning

Stitches & Techniques you need to know:
  • Magic Ring
  • Crocheting in Continuous Rounds (Amigurumi style)
  • Slip Stitch  (SLST)
  • Single Crochet (SC)
  • Half Double Crochet (HDC)
  • Double Crochet (DC)
  • Single Crochet 2 Together (SC2TOG)
  • Repeat Between **

THE BODY:

USING YOUR PURPLE YARN MAKE MAGIC CIRCLE, THEN CH1

ROUND 1: SC 6 INTO CIRCLE, PULL TIGHT

ROUND 2: SC 2 IN EACH SC (you are now crocheting in the round, you do not need to slip stitch in the first stitch from the first round – you simply start the next round in that stitch, get it?) Use your stitch marker after you have made your first SC so you know where your next round will begin. 
ROUND 3: *SC 2 IN FIRST SC, THEN SC IN NEXT*
ROUND 4: *SC 2 IN FIRST SC, THEN SC IN NEXT 2*
ROUND 5: *SC 2 IN FIRST SC, THEN SC IN NEXT 3*
ROUND 6: *SC 2 IN FIRST SC, THEN SC IN NEXT 4*
ROUND 7: *SC 2 IN FIRST SC, THEN SC IN NEXT 5*
ROUND 8: *SC 2 IN FIRST SC, THEN SC IN NEXT 6*
ROUND 9-12: SC IN EACH STITCH
ROUND 13: *SC2TOG, SC IN 6*
ROUND 14: *SC2TOG, SC IN 5*
ROUND 15: *SC2TOG, SC IN 4*
ROUND 16: *SC2TOG, SC IN 3*
ROUND 17: *SC2TOG, SC IN 2*
ROUND 18: SC2TO, SC*
ROUND 19: SC2TOG
FINISHING THE BODY: LEAVE A LONG TAIL!!! THREAD THROUGH REMAINING STITCHES AND PULL TIGHT. WITH THE REMAINING TAIL PUSH YOUR NEEDLE THROUGH THE CENTER OF THE BODY UP THROUGH THE CENTER OF THE FIRST ROUND (SMALL HOLE). PULL THE YARN TIGHT SO IT CREATES A SORT OF INDENTION IN THE BOTTOM OF THE BODY. THIS WILL ALLOW THE FRUIT TO SIT FLATLY ON A SURFACE AND NOT TOPPLE OVER. WHEN FINISHED TIE OFF AND WEAVE IN ENDS.

STEM:
MAKE MAGIC CIRCLE, CH 1
ROUND1: CROCHET 4 SC LOOSELY IN MAGIC RING, PULL RIGHT TIGHT
ROUND2-4: SC IN EACH SC
ROUND 5: CROCHET THROUGH FRONT LOOP ONLY!
YOU ARE NOW MAKING THE "PETALS" AT THE BASE OF THE STEM. EACH OF THE 4 SC WILL BECOME A “PETAL."

IN FIRST SC: SLST, HDC, DC, DC, HDC, SC
IN SECOND SC: SLST, HDC, DC, DC, HDC, SC                  
IN THIRD SC: SLST, HDC, DC, DC, HDC, SC
IN FOURTH SC: SLST, HDC, DC, DC, HDC, SC – SLST IN THE FIRST PETAL AND TIGHT OFF … LEAVE LONG TAIL FOR SEWING.
FINISHING THE STEM: SEW THE STEM TO THE TOP OF THE BODY. WITH THE REMAINING GREEN THREAD PUSH YOUR NEEDLE DOWN TO THE BOTTOM OF THE  FRUIT AND EMBROIDER A LITTLE BOTTOM.

Hope you found my pattern easy! It shouldn't take very long to make one of these. What I like about this pattern is that it can be a base for so many other types of things! You are pretty much making a ball for the body. Change the colors and you could make a tomato, pumpkin ...etc. 

Please feel free to leave a comment if you have any questions at all, I would also love to see your finished mangosteen if you have one to share! 

** I will add that I hope to make another Mangosteen that has been opened to show off the white pulpy deliciousness that is inside! **


Saturday, November 3, 2012

2,000 Views!

Hey All!

I am very excited today because my blog as reached 2,000 views! I have been working hard on my humble little blog since March and have been so happy with its evolution since then. I definitely enjoy it as a place to show-and-tell all my crochet projects ramble about all the other goings on in my life back in the enchanted hollow. I just wanted to thank everyone who visits my blog regularly and most importantly give me feed back! I love hearing from everyone who reads my blog, just as much as I love commenting on other blogs. 

I'll keep puttering away at this, if you keep reading!

Here is a sneak peek at my granny square throw I have been working on ... COLORS!!


Tuesday, October 30, 2012

Final Days of Fall and Baby Pumpkin Beanie


PUMPKIN BEANIE

This Little Pumpkin Beanie was super super easy to make! I kept searching and searching for a pumpkin beanie and I just didn't care for any of them, so I just sort of guessed at what to do and I really like the way It tuned out! What is also great about this hat pattern is that  it could also be used to make an apple beanie.
WHAT YOU NEED:
- Worsted Wieght Yarn in Green and Orange
- Size H or I Hook
- Darning Needle
-Stitch Marker

WHAT YOU NEED TO KNOW:
- Magic Ring
- SC = Single Crochet
- How to work in the round - this means no Slip Stitch and Step up at the end of the round - you just keep going - you know your place because you use a stitch marker after your first round of SC and keep using it until you are done. 

First start with stem and then work in the round.  
Here's what I did.

Stem: Using Green Yarn and size H Hook, 
Make Magic Ring and crochet 6SC in ring.
Continue in the round until you have the length you want. 
(use a stitch marker so you know where your round starts/ends)
Once you have the length desired just increase by one each round. Soooo...
SC 2 in each SC for the first round off the stem =  12 stitches.
Next round, SC in SC, SC2 in SC ... repeat around.
Next round, SC in SC, SC in SC, SC2 in SC ...repeat around.
Next round, SC in SC, SC in SC, SC in SC, SC2 in SC
So on and so forth.
Continue with green until you are ready to switch colors.
When you switch to orange, use size I Hook
keep continuing increasing with the orange until you have the right size to fit your baby or child or maybe yourself? I just kept putting it on my baby's head! ;)
After you have achieved the right width, just keep crocheting 1SC in each SC with no increases until you have the right length. Then slip stitch and tie off  and weave in ends! 

You could easily add ear flaps to this, or a decorative little edging. I made this for my son so I kept it simple. 
I think the leaf makes it even sweeter! 
I know this isn't a true pattern, so please message me or comment if you need help!
 V

Sunday, September 23, 2012

Easy Apple Turnover Recipe

       For many people Fall is the season of the Pumpkin, but personally I prefer Apples. I have been craving apple turnovers lately, so I decided to whip some up ... this is a very quick and easy recipe, with just a few ingredients most people have in their cabinets.

 What You'll Need:
-  4 Gala Apples (Granny Smith works too)
- 3 Tablespoons Butter
- 1 Cup Brown Sugar
- 1 Tablespoon Cinnamon
- 1 Tablespoon Corn Starch
- 2 Tablespoons Lemon Juice
- 1 pkg frozen Puff Pastry thawed
- Flower for dusting


PREHEAT OVEN TO  400 Degrees


First Peel, Core, and Chop Apples. 
Place applies in a bowl of water with the Lemon Juice to keep from browning.


Next in either a large pot or a large skillet (skillet is preferable, I just don't have one big enough so I use a pot) melt the butter over a medium heat. Remove apples from water and add to the hot buttery pot/skillet. 
Stir together for about 3 minutes, coating the apples in the butter.


Then add Cinnamon and Brown Sugar, stir well for 5 minutes.  


 Once sugar is nicely melted and apples are well coated, combine 1 tablespoon cornstarch with 1 tablespoon water to the mix to thicken. Add more corn starch if needed. 
Remove from heat to allow to cool a bit. 


Meanwhile the puff pastry sheets should be thawed.
Unwrap and spread your first pastry sheet onto flower dusted cutting surface. 


 Then cut into 4 smaller squares. I use a pizza cutter.


Add a scoop of apple mixture to the center of  each square.


Yuuummmmmmmmmmmm... 


Fold the pastry dough into triangles, it should be stretchy but you may need to repair tears. 
I like to use a fork to smoosh edges together.

Coat cookie sheet with non stick baking spray or very light butter. 

Then, using a spatula, carefully place turnovers onto the sheet.

You should have 8 total. 

Place in oven and bake for about 25 minutes or until golden.


 When done remove from oven and allow to cool completely ... 


They smell soooo apple-cinnamony good!


Optional Icing:
1 cup confectioners sugar
1 teaspoon vanilla
1 tablespoon milk
Mix together ... add more milk if needed and drizzle over pastry - a delicious extra treat!
*Be sure the pastry is completely cool before adding icing or you have a huge melty mess! 


I hope you all enjoy this recipe ... they are very quick and easy to throw together.  I do cheat by using the store bought pastry sheets, but they still taste delicious! 

Left over apple mixture would go great on a bowl of vanilla ice cream! ;)

Friday, September 7, 2012

Simple Crochet Hat/Beanie Pattern


I have searched and searched for a basic crochet beanie/hat since I first started crocheting. I have tried several different hat patterns and finally figured the best "recipe" for a simple beanie that worked for me. I could whip one of these up in the course of an evening.  Add frills at your own discretion.


This is my first real attempt at writing out a pattern - it's super simple so that made it feel possible. . .


Simple Beanie Pattern

Materials:
Yarn: Worsted Weight ... I used "I Love This Yarn"
Hook: I
Needle for Darning

Stitches Used:

  • Magic Ring
  • Chain
  • Double Crochet (DC)
  • Slip Stitch
The hat is made in rounds, joined at the end of each round. 


Rnd 1: Start with Magic Ring... Chain 2, 9 double crochet. Slip stitch in top of first chain 2 (10 sts)

Rnd 2: Chain 2, double crochet in same stitch. 2 double crochet in each stitch around. Join with slip stitch in top of first Chain 2. (20 sts)

Rnd 3: Chain 2, 2 DC in next stitch. *1DC in next stitch, 2DC in next stitch* Join with slip stitch in top of first Chain 2. (30 sts)

Rnd 4: Chain 2, DC in next stitch, 2 DC in next stitch. *1 DC in next 2 stitches, 2 DC in next stitch. Repeat from*  Join with slip stitch in top of first Chain 2. (40 sts)

Rnd 5: Chain 2, DC in next 2 sts, 2 DC in next stitch. *1 DC in next 3 stitches, 2 DC in next stitch. Repeat from*  Join with slip stitch in top of first Chain 2. (50 sts)

Rnd 6: Chain 2, DC in next 3 stitches, 2 DC in next stitch. *1 DC in next 4 stitches, 2 DC in next stitch. Repeat from*  Join with slip stitch in top of first Chain 2. (60 sts)

Rnd 7-16: Chain 2, DC in every stitch.  Join with slip stitch in top of first Chain 2 . Fasten off and weave in yarn. (60 sts)*


*You may need to increase the amount of row depending on the size of the head you are making the hat for. This pattern worked for my head, but if you need a larger size add more rows.

Good Luck!